The festive season is approaching and what better way to decorate your table than with a homemade candlestick holder centerpiece. Christmas is a time of gathering family and dining together, and your dining area will certainly stand out with a handmade candle holder.
For a long time, we’ve been infatuated with candles and candle holders. Nothing calms us as much as having a gorgeous candle glowing on the side while we go about our daily activities. It simply makes us feel better!
We’re also the type of individuals who become bored with our smaller décor pieces quickly and like to switch them up frequently. That’s why we’ve been searching into various candle holder designs that would look great regardless of the type of candle or tea light you have, and we’ve decided to share them with you and show you how to make your own one within minutes.
It couldn’t be easier; all you need is any old plank of wood and a handful of tools. The best thing about homemade goods is that you can customize them to suit you. You can adapt the measurements to sit nicely on your table and can decorate the candleholder to match your color scheme. You’re given no restrictions when crafting your own creations, so run wild.
Page Contents
Equipment
In order to begin your candlestick holder centerpiece project, you’ll need to gather the following:
- A straight wooden block
- Fine-grained sandpaper
- A 38mm router tool (click here to learn more)
- A 35mm Forstner drill bit
- A chisel
- A hammer
- Tealights
- A Pencil
- Natural beeswax
- A cloth
Step One
Once you have gathered all the materials and equipment that you need, you can start by tidying your wooden block. You’ll need to level up the ends with a saw and sand away any coarse patches. It’s at this point that you should decide whether you’re after an immaculate finish or a rustic look as this will determine how much sanding is necessary.
Step Two
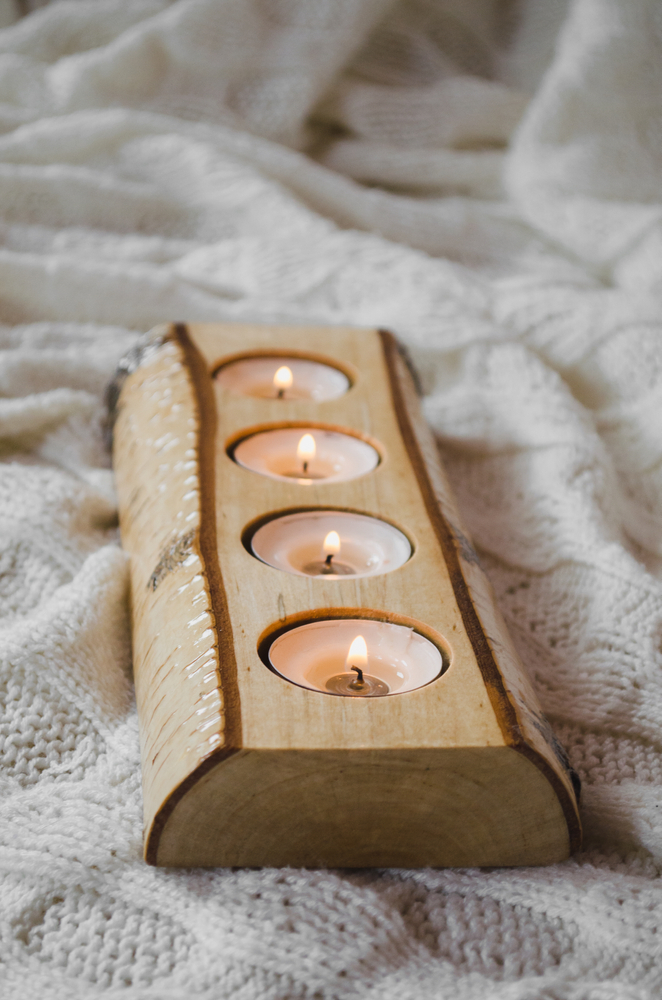
Next, you should position your tealights down one side of the wooden block and mirror tealights across the opposite side. You should line these up with the tealights on the other side and draw around them with a pencil. Once again, you should determine whether you’re looking for a rustic look or a neat finish so that you can decide whether to accurately distance the tealights by exact measurement or not.
Step Three
After this, you should ensure that your 38mm router tool fits your tealights; this shouldn’t be a problem as this is a standard tealight size. Following this, you should match the edges with the pencil circles that you previously drew and cut into the wood by 2 cm. Next, make a 2 cm deep hole in the middle of the marked circles with the 35mm Forstner drill. You might find that this involves a bit of muscle work.
Step Four
Following this, you should use a hammer and chisel to remove any excess wood that is obstructing the hole that you’ve made. Next, check that your tealights slot nicely into the gaps that you’ve created. If you find that it’s a bit of a tight squeeze, chisel a bit more off the edges to alter the size.
Step Five
By this point, your wooden block will inevitably be covered in wooden debris and pencil marks. In order to remove this, you should brush the wood with fine sandpaper and wash away any dust using a damp rag.
Step Six
To finalize, you should apply two layers of clear beeswax onto your wooden plank. This will protect your wood and draw attention to organic grains. Depending on the ambiance that your candlestick holder centerpiece will sit amongst, you might leave it at that, or you might paint your finished piece with color.
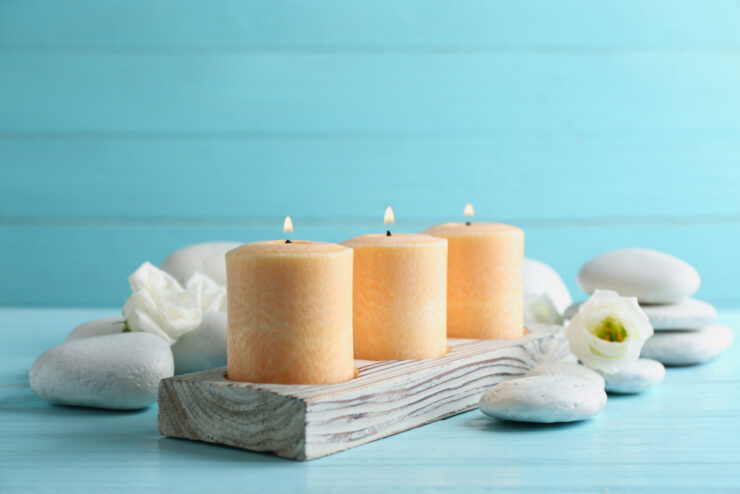
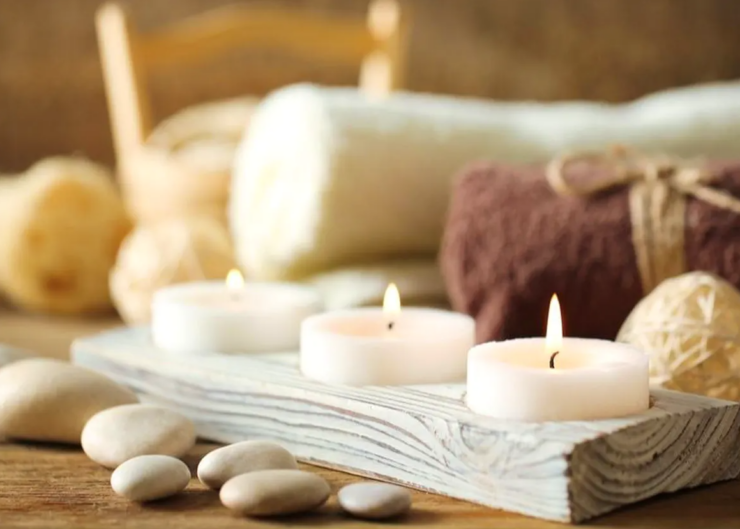
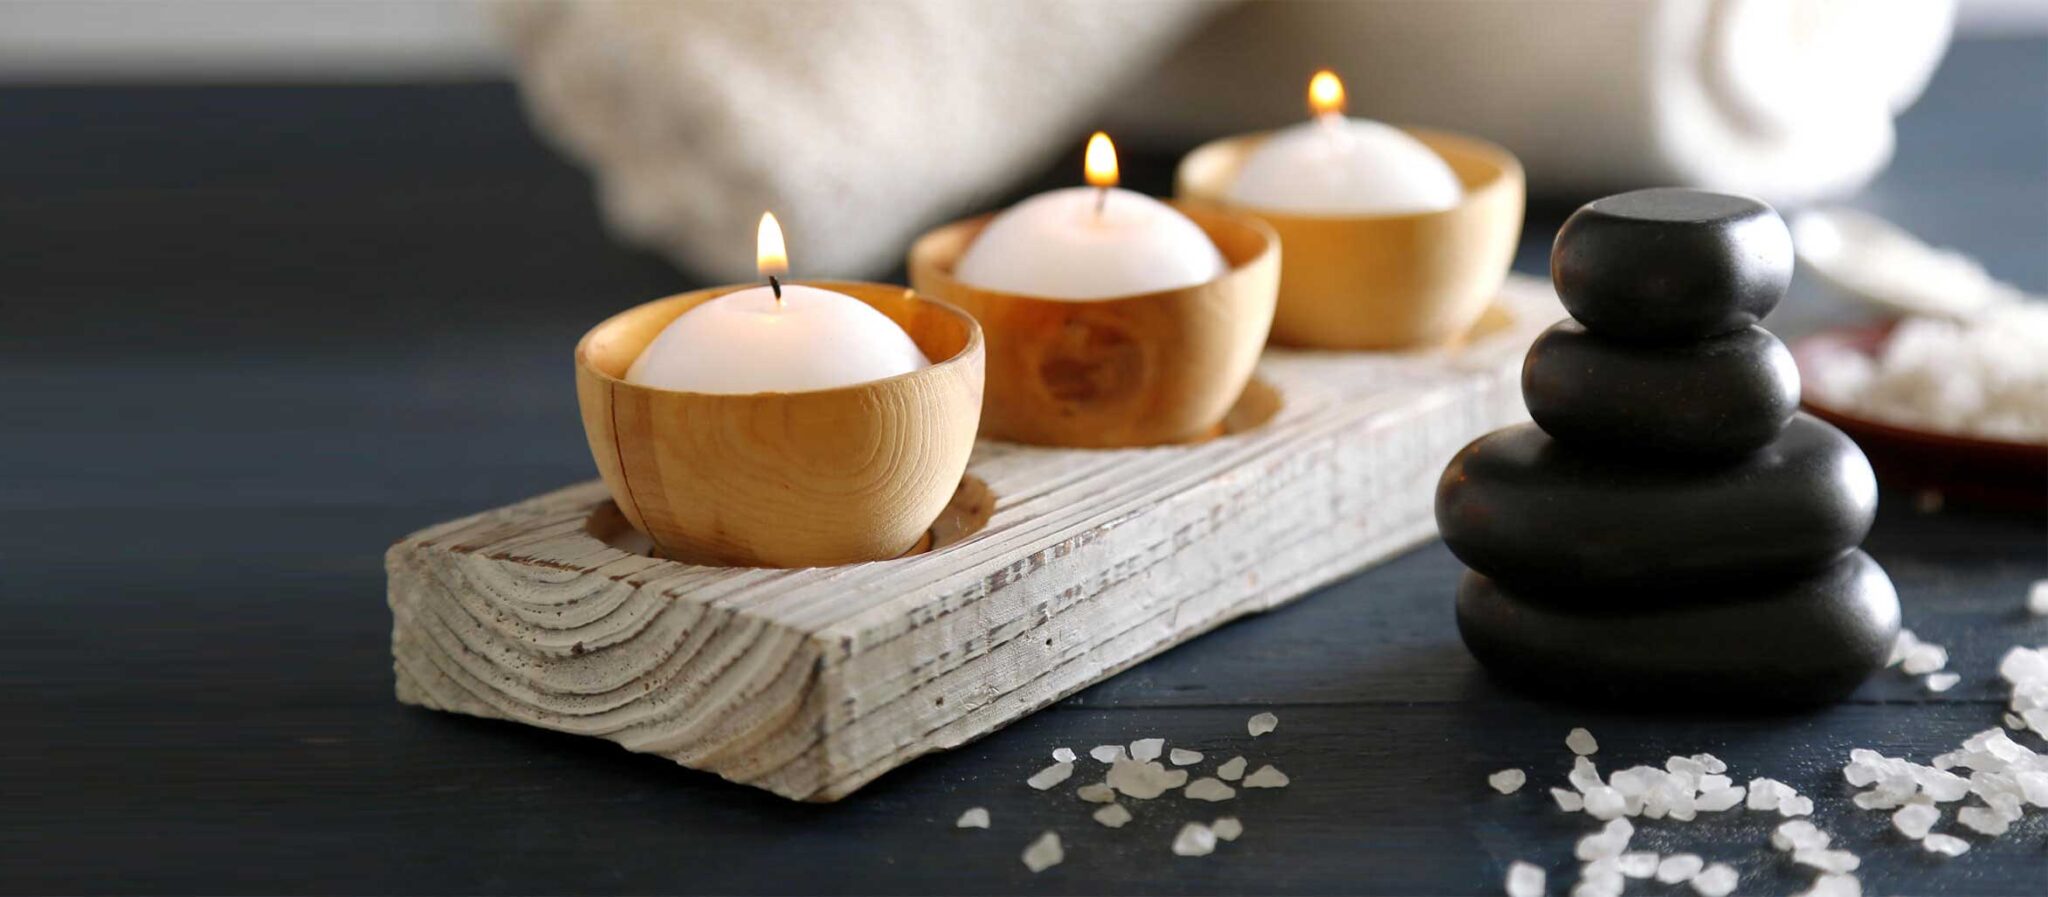
For a rustically classic candleholder, it’s recommended that you end with the beeswax finish. However, if you’re after a more quirky and individual style, it’s a fun idea to get some wood paint and color your creation. Whichever finish you opt for, you can pop your tealights into the holes and you’ll be ready to go. Your table will be a real showstopper.
This is the age of competitiveness, of striving to outperform other people in all aspects of life, and as a result, we have busy and exhausting work schedules all day. We need to take some relaxing, soothing, and cheerful breaks from our stressful routines so that our minds and bodies may relax.
Luckily, you do not need to organize any overseas or outdoor trips. You can do it every day or at least on weekends to spend quality time with your family. Dinners that are romantic and attractively organized are the greatest method to do this. A tastefully set dining table, delicious food on it, and a happy family cluster will undoubtedly bring the serenity of mind and body. Keep in mind that no significant décor is complete without a stunning candle centerpiece. I hope that this tutorial will help you create your very next favorite table centerpiece that will turn heads.
Candles come in a limitless variety of forms, colors, and aromas today, so incorporating them into our home decor is simple. Mix and match your candle holders if you want to be creative and turn your home into a special spot not just for the holidays but for every day as well. Think outside the box when it comes to themes if you are about to host an event or your existing home decor if it comes to everyday use and decide what will work best in your surroundings.
What will you do with your candlestick holder centerpiece this Christmas? Would you like to give this tutorial a try? If you just follow the steps above, I’m sure that your DIY project will be a total success. Moreover, everyone will be asking you how you made it. Feel free to share this article with anyone having curious inquiries.