If your roof is leaking, it is advisable to do something about it quickly. While it might not bother you much, and you could be planning to install a new roof in the near future, even over a limited period of time, roof leaks can result in serious issues. For instance, a small leak can lead to mould, rotting of your framing and sheathing and ceiling damage.
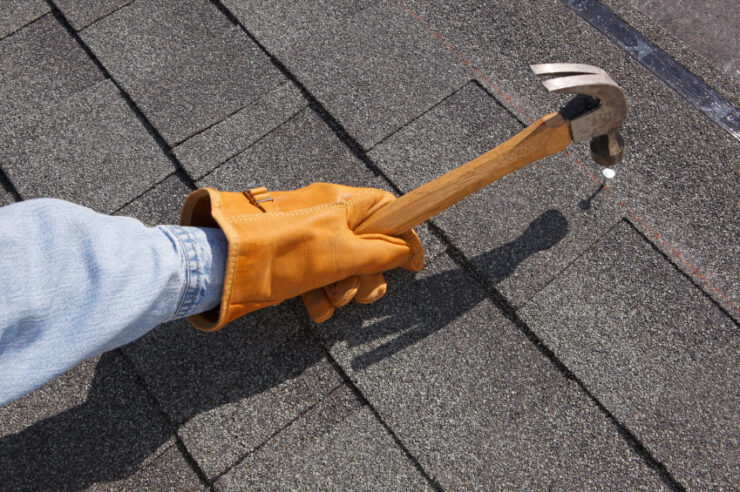
When dealing with roof leaks, fixing the leak is the easy part. What’s more difficult is locating the source of the leak. In most instances, the source is located away from where you notice the water dripping down. For you to discover the actual opening, you have to “think like water”. It usually enters through worn, damaged or missing shingles or where nails are loose and corroded. Sometimes water also comes in through intersections of roof planes.
Once it manages to come in through the roofing, water tends to flow along the sheathing, rafter and ceiling surfaces until it finds an opening large enough for it to drip down, usually onto your most loved furniture item.
Page Contents
Locating the leak

It’s best to try and identify roof leaks during the day. You can get into the ceiling with a torch or any bright enough light source. Nowadays, cell phones come equipped with bright flashlights so that you can use that as well. When you manage to enter the ceiling, ensure that you step only on framing bars and never on the ceiling surface. The ceiling surface is not strong enough to support you, and you will quickly find yourself on the floor below.
With your light source, locate the place where the water is dripping and then work your way uproof by following the trail of wetness on the framing members. If you are having difficulties locating the exact point on the roof where it’s leaking, you can switch off the light source and check where daylight enters through the roof. This should help you pinpoint the leak. If the water is actively coming in, you can place a bucket under the leak. You have to ensure that the bucket sits on an area that has enough support so that it doesn’t fall in as well. When the bucket is in place, let it collect the water until it stops raining then you can fix the leak.
Fixing the leak.
How you fix a roof leak is mostly dependent on the type of roof you have. If you have an Asphalt shingle roof, then you are in luck. These roofs are crafted with cutting edge advancements in weather resistance and fire protection. However, like any other roof, they can develop a leak, and the upside is that they are relatively easy to fix. You can simply flatten and resecure curled shingles and replace the older ones. With an Asphalt shingle roof, it’s also relatively easy to identify the leak.
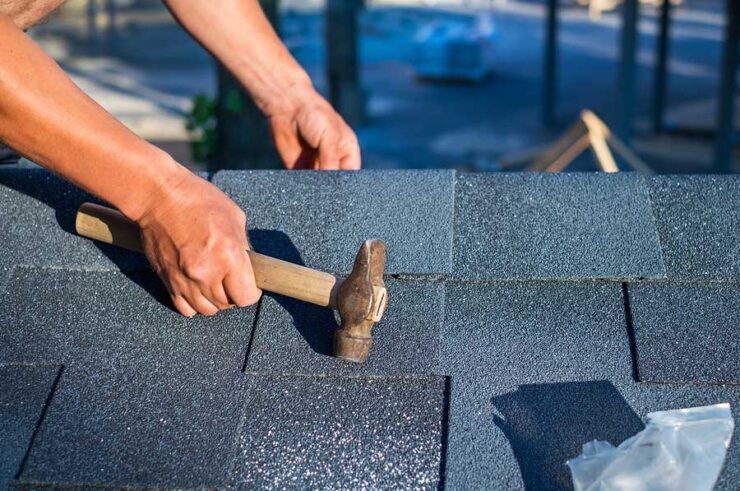
Step 1 — Securing curled shingles.
Curled-back shingles can be fixed by applying a some asphalt roofing cement. You can also utilize rubberized wet patches as well. A caulk gun is recommended for ease of application. It is advisable to apply generous amounts of roofing cement on the shingles’ underside to ensure that corners and edges are appropriately secured. When you are done applying, press on the shingle firmly to set, you must note, however, that shingles are softer and more pliable when it’s hot, so you should put that into consideration when you are fixing the leak.
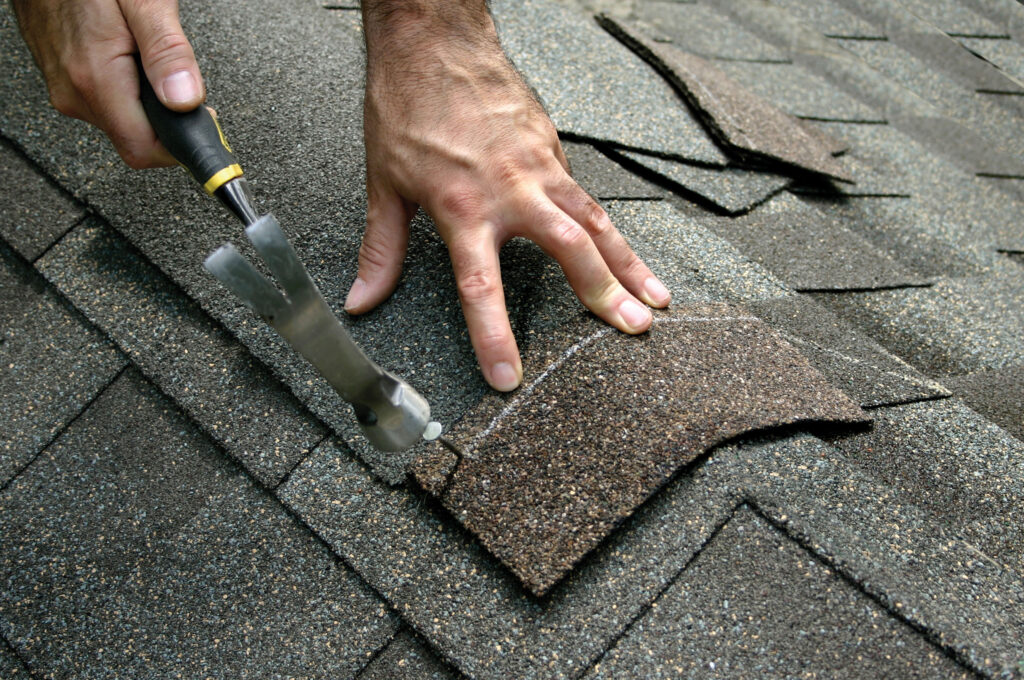
Step 2 — Replacing damaged and missing shingles.
If shingles are beyond repair or missing, the most straightforward fix would be to replace them. The replacement process is relatively easy, lift the adjacent shingles’ edges and remove the nails holding the target shingle in place, then slide it out of position and remove it. Clean the area and remove any cement and protruding nails before placing a replacement. Before putting a new shingle in place, use a knife to round its back corners. This makes it somewhat easier to slide it under the one on top and position it properly to align with the ones adjacent to it perfectly.
Once the shingle is in position, lift the adjacent ones’ corners and secure the new ones using the proper roofing nails. Each corner should be appropriately connected with a nail before you cover the nail heads with roof cement. Once that is done, you can go ahead and smooth down the edges of the shingle.
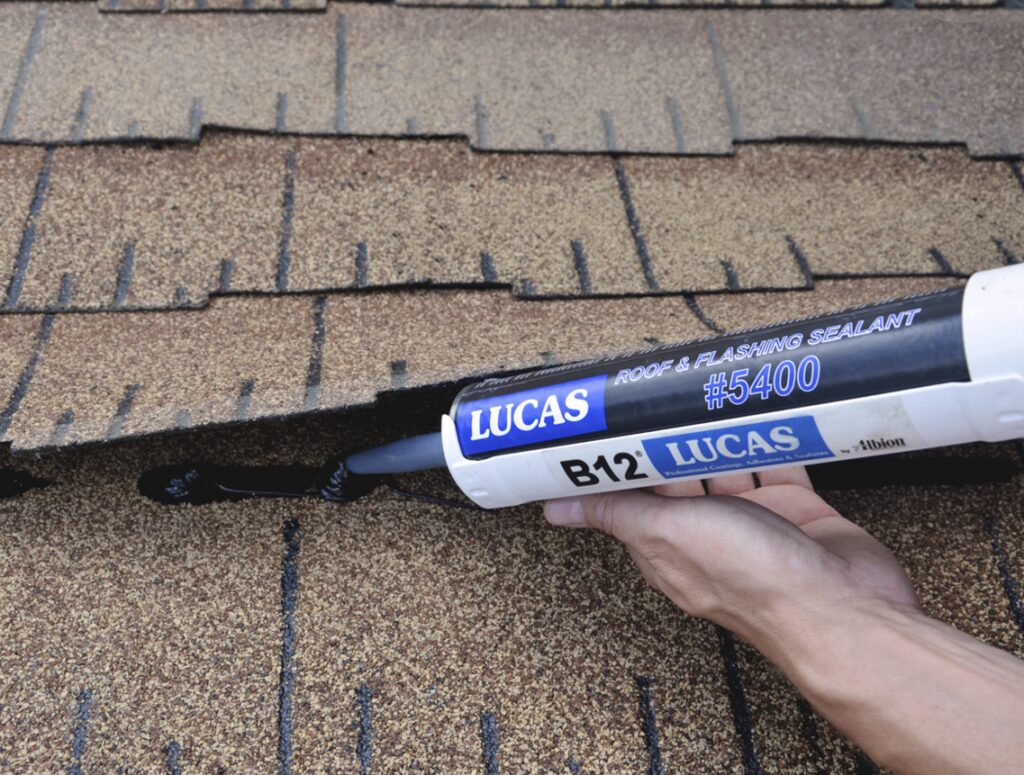
Fixing the flashing
Leaks can also be caused by the metal flashing around chimneys and dormers. These are relatively easy to repair in most instances. More often than not, all that is needed is to reseal the joints. You can use a caulk gun to apply roofing cement on the flashing. If there is any damage to existing joints, you can apply a fresh coat of roofing cement using a putty knife.
Don’t rely too much on Caulk!
Caulk is a quick fix for roof leaks, but you should not rely on it. It’s always important to take the “mechanical” leaky roof fix where you can. It is only perfect for small roof leaks. Also, if there is a need to replace or fix entire rows of shingles or if you try several times to fix the leak and fail, it might be time to call in the professionals. DIY repairs are only useful for minimal problems. Also, the process of repair leaks involves using ladders, and if you are not comfortable using such equipment, it’s better to leave the work to experts.